Bamboo Comparisons
Introduction
Finding the Most Efficient Bamboo Farm
I set out with a clear goal: find the most efficient bamboo farm in Minecraft — not just by raw output, but by three factors that actually matter to a survival player. Lag impact, bamboo output per volume used, and total resource cost. Most comparisons you'll find online focus on a single metric and call it done. I wanted the full picture.
What I found along the way surprised me. In the process of designing and testing, I stumbled across two bamboo farm designs that, as far as I can tell, have never been documented anywhere before. This post covers five farms — two popular existing designs, one variant on a classic, and my two originals.
I'll show you why you shouldn't build one of my farms, and why one of the most widely recommended designs isn't as efficient as its reputation suggests.
One of those original designs has since been refined well beyond what's tested here. The full, optimised version now stands as a legitimate heavyweight in the bamboo farm world — and you can find that dedicated build post linked below. Consider this the story of how it got there.
The numbers below give you an idea of how effective each farm is, but they don't tell the full story. Keep reading to find out the best farm to use!
Mechanics
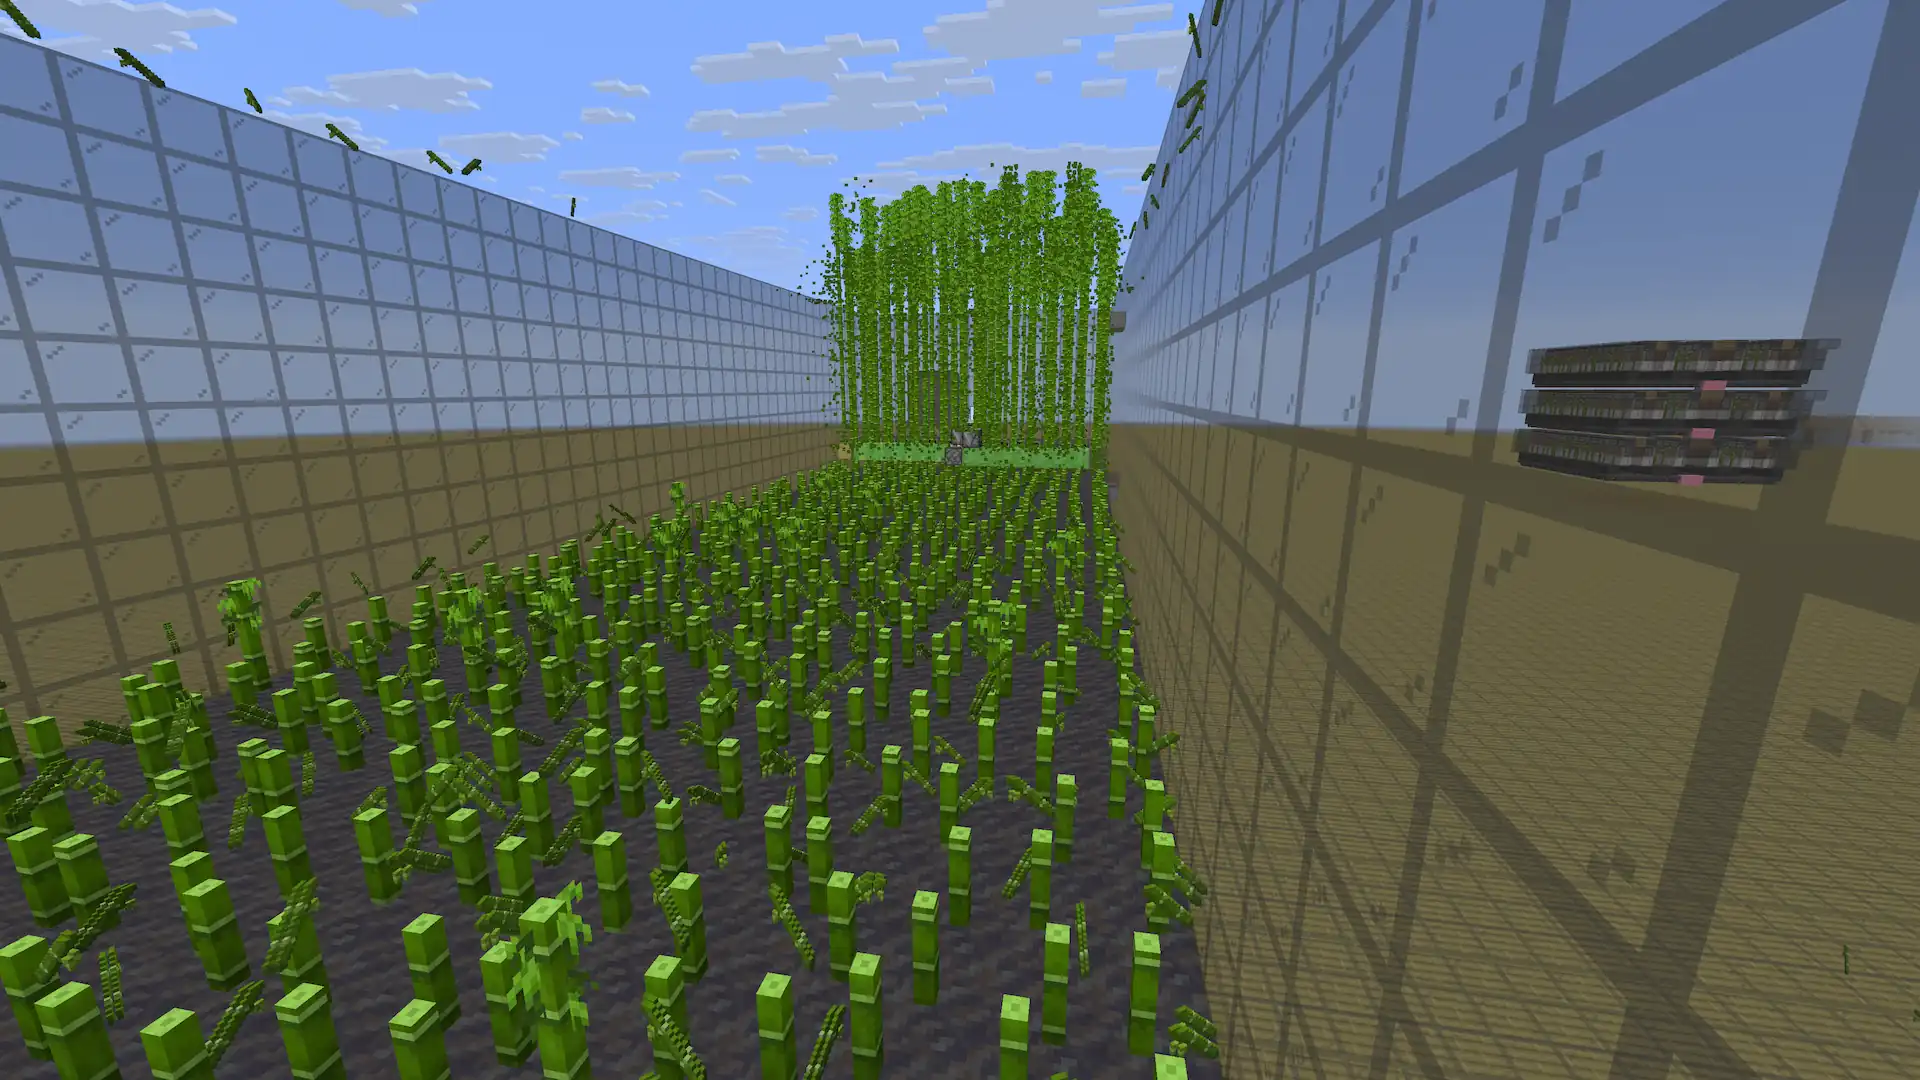
How Bamboo Grows
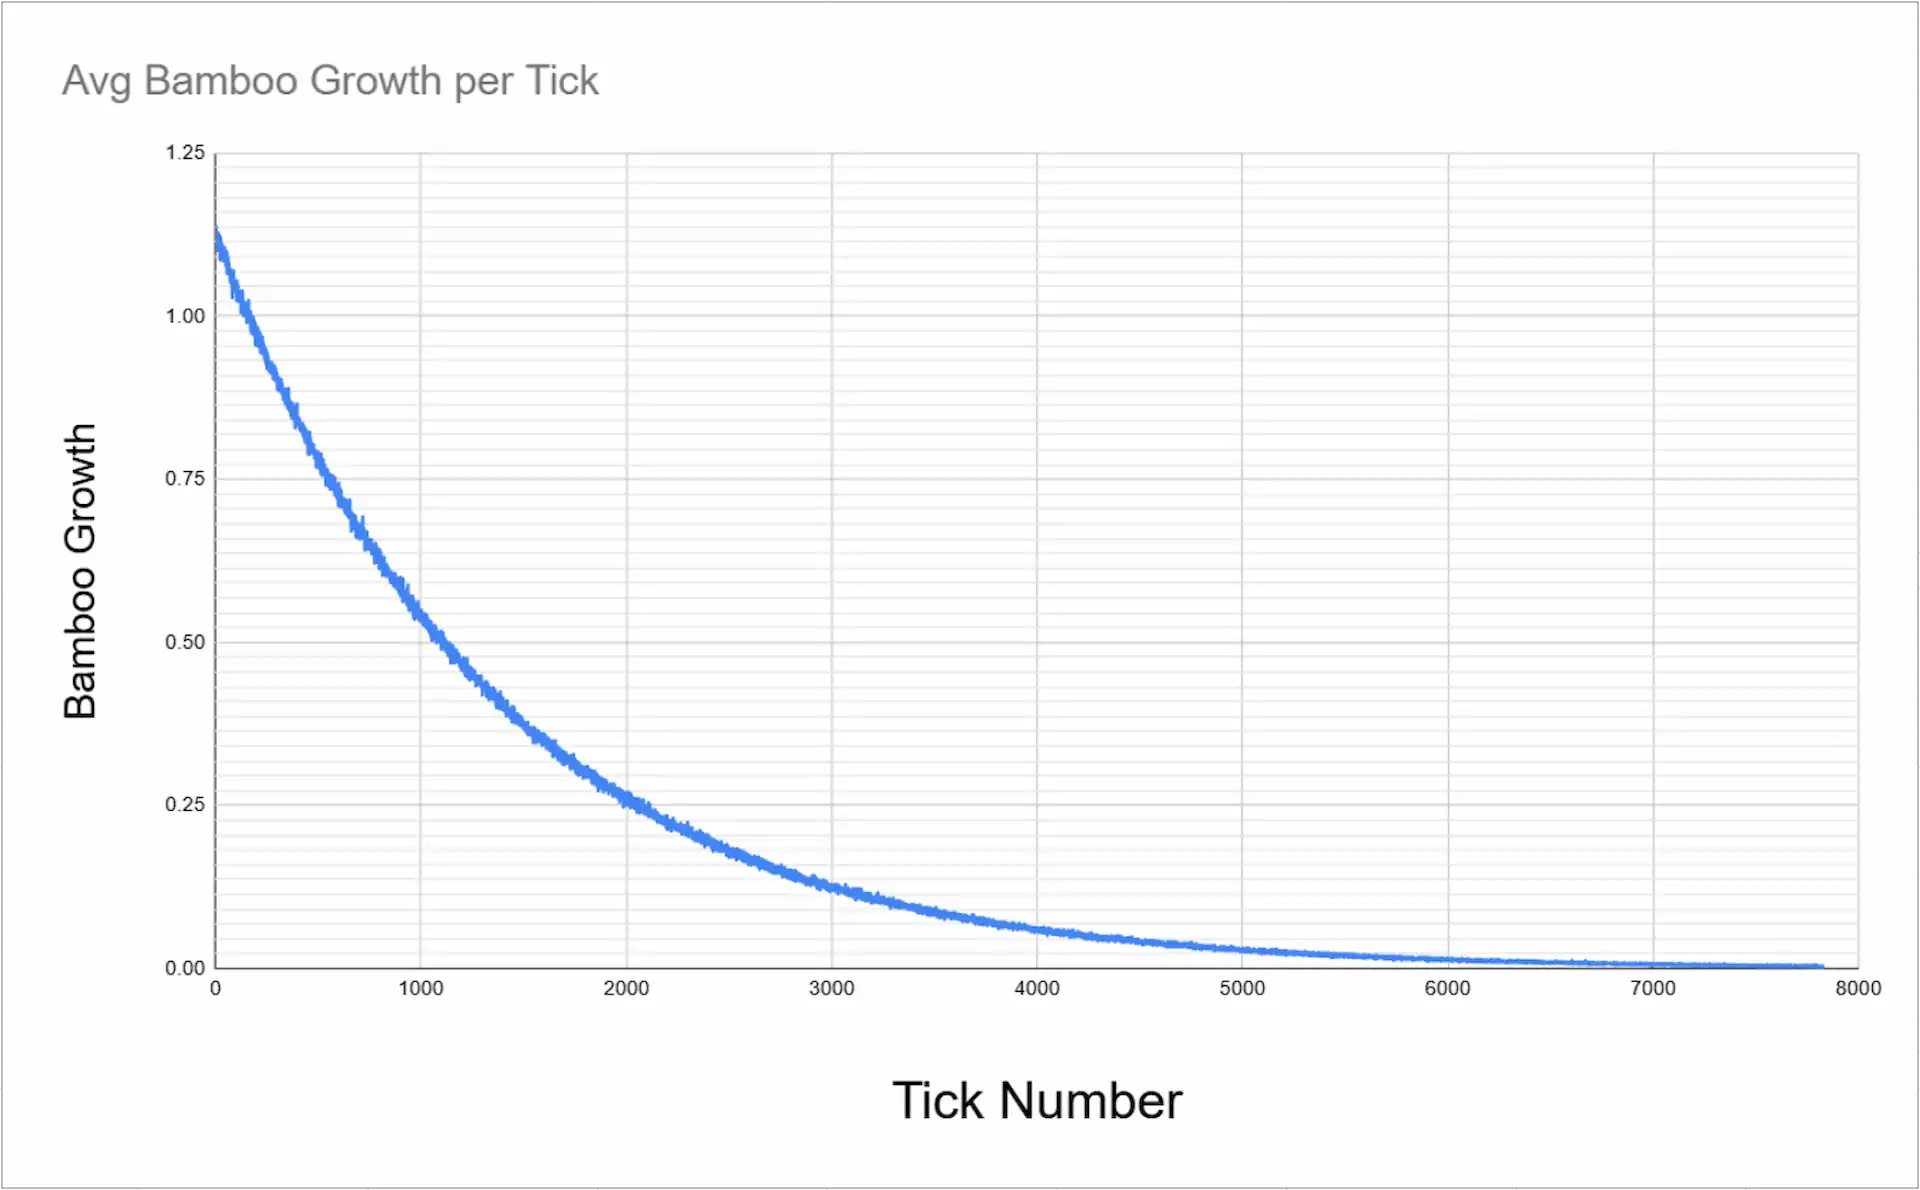
Before comparing designs, it's worth understanding the mechanic that every bamboo farm lives and dies by. On every game tick — and Minecraft runs at 20 ticks per second — the game randomly selects 3 blocks from within a 16×16×16 chunk volume. If any of those randomly selected blocks happens to be a bamboo shoot with open air directly above it, that bamboo grows by one block.
The implication for farm design is significant. A farm that fills its chunk volume as densely as possible with bamboo shoots maximises the probability that any given random tick lands on a harvestable plant. A farm that fills the same volume with mechanical components, empty buffer space, or transit tracks is effectively wasting random ticks on blocks that don't grow.
Every design in this comparison was evaluated with that trade-off in mind: how much of the 16×16×16 volume is productive bamboo, and how much is overhead?
Comparisons
Farm Comparisons
Flying Machine
The flying machine farm is one of the most visually impressive bamboo designs in the community. A slime-block flying machine sweeps back and forth across a field of bamboo, shearing stalks as it passes. It scales cleanly to multiple chunks, requires no redstone at the individual plant level, and looks undeniably satisfying in action.
The problem reveals itself when you map the design against the surrounding area. The build demands space and there's simply no way around it. On top of this, flying machines are notorious prone to breaking during chunk loading and unloading. Giving them a couple strikes dispite their impressive output numbers
Observer-Piston
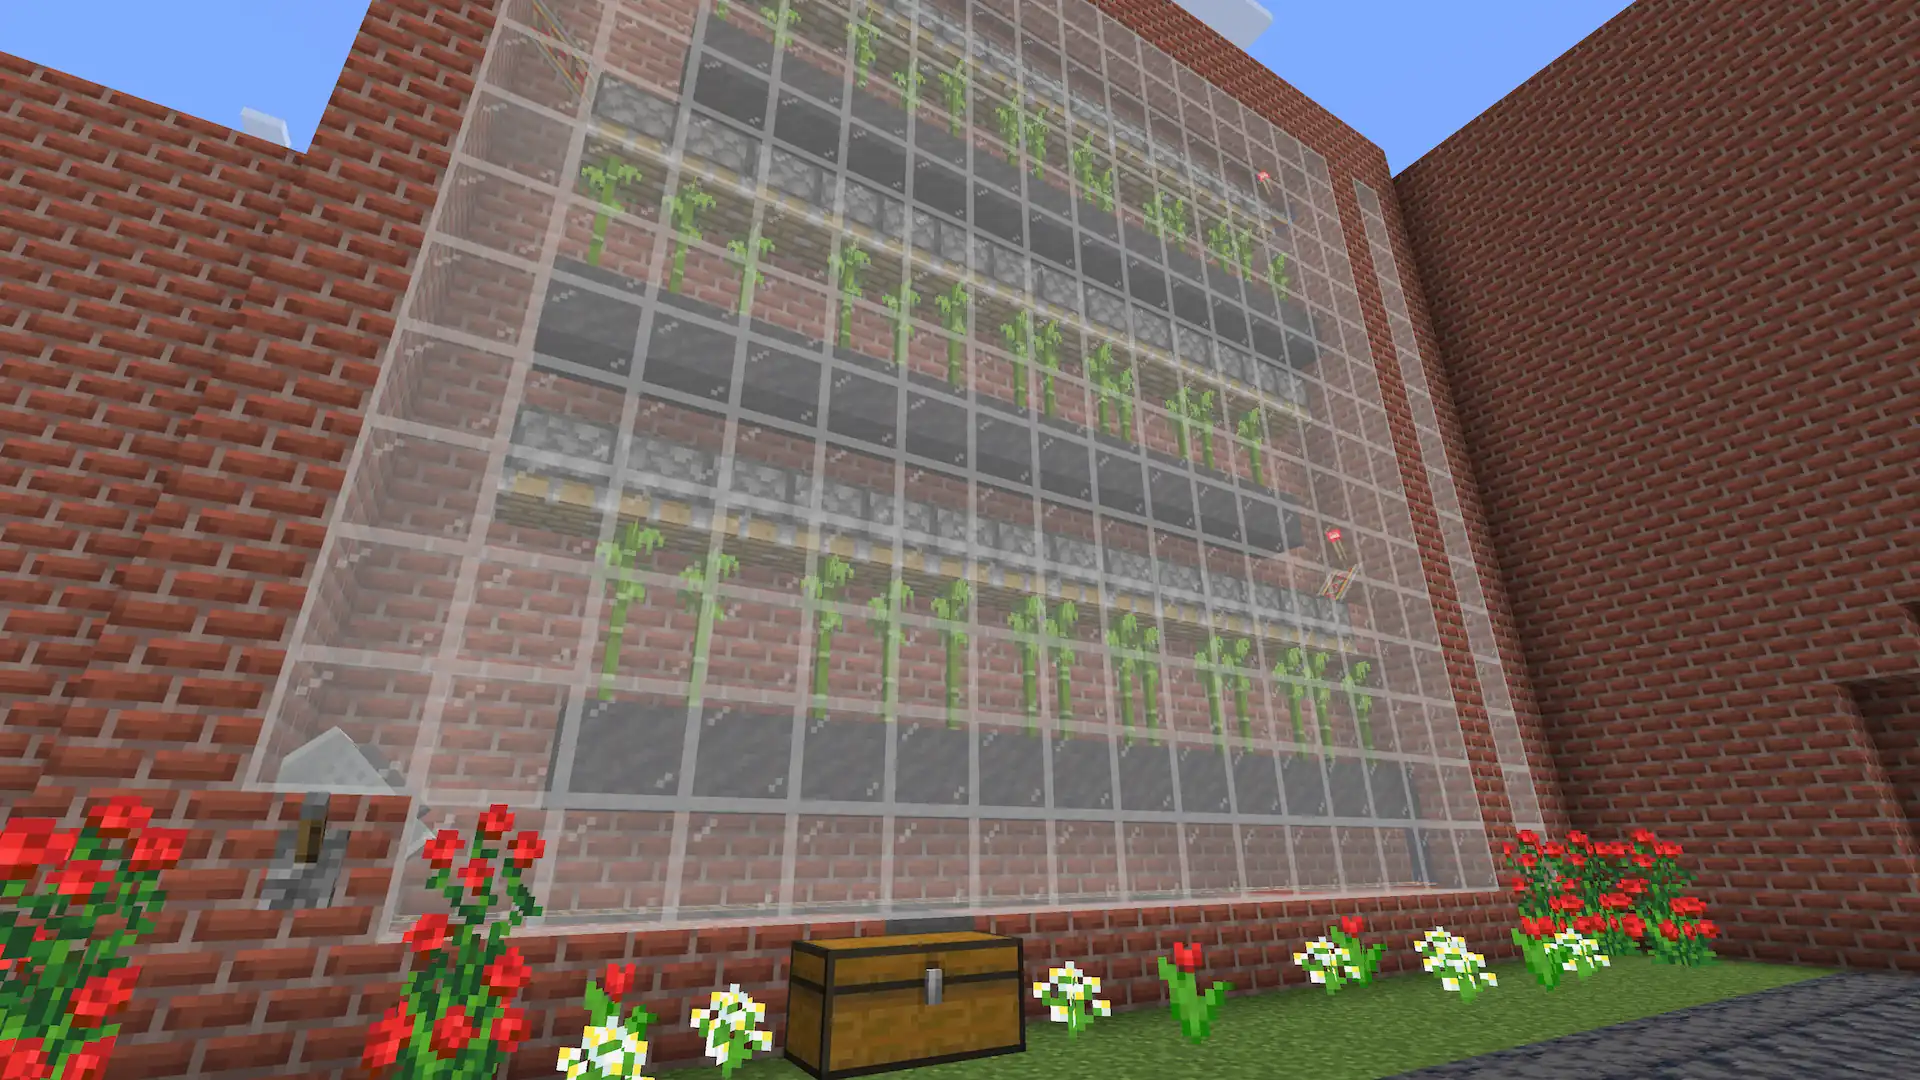
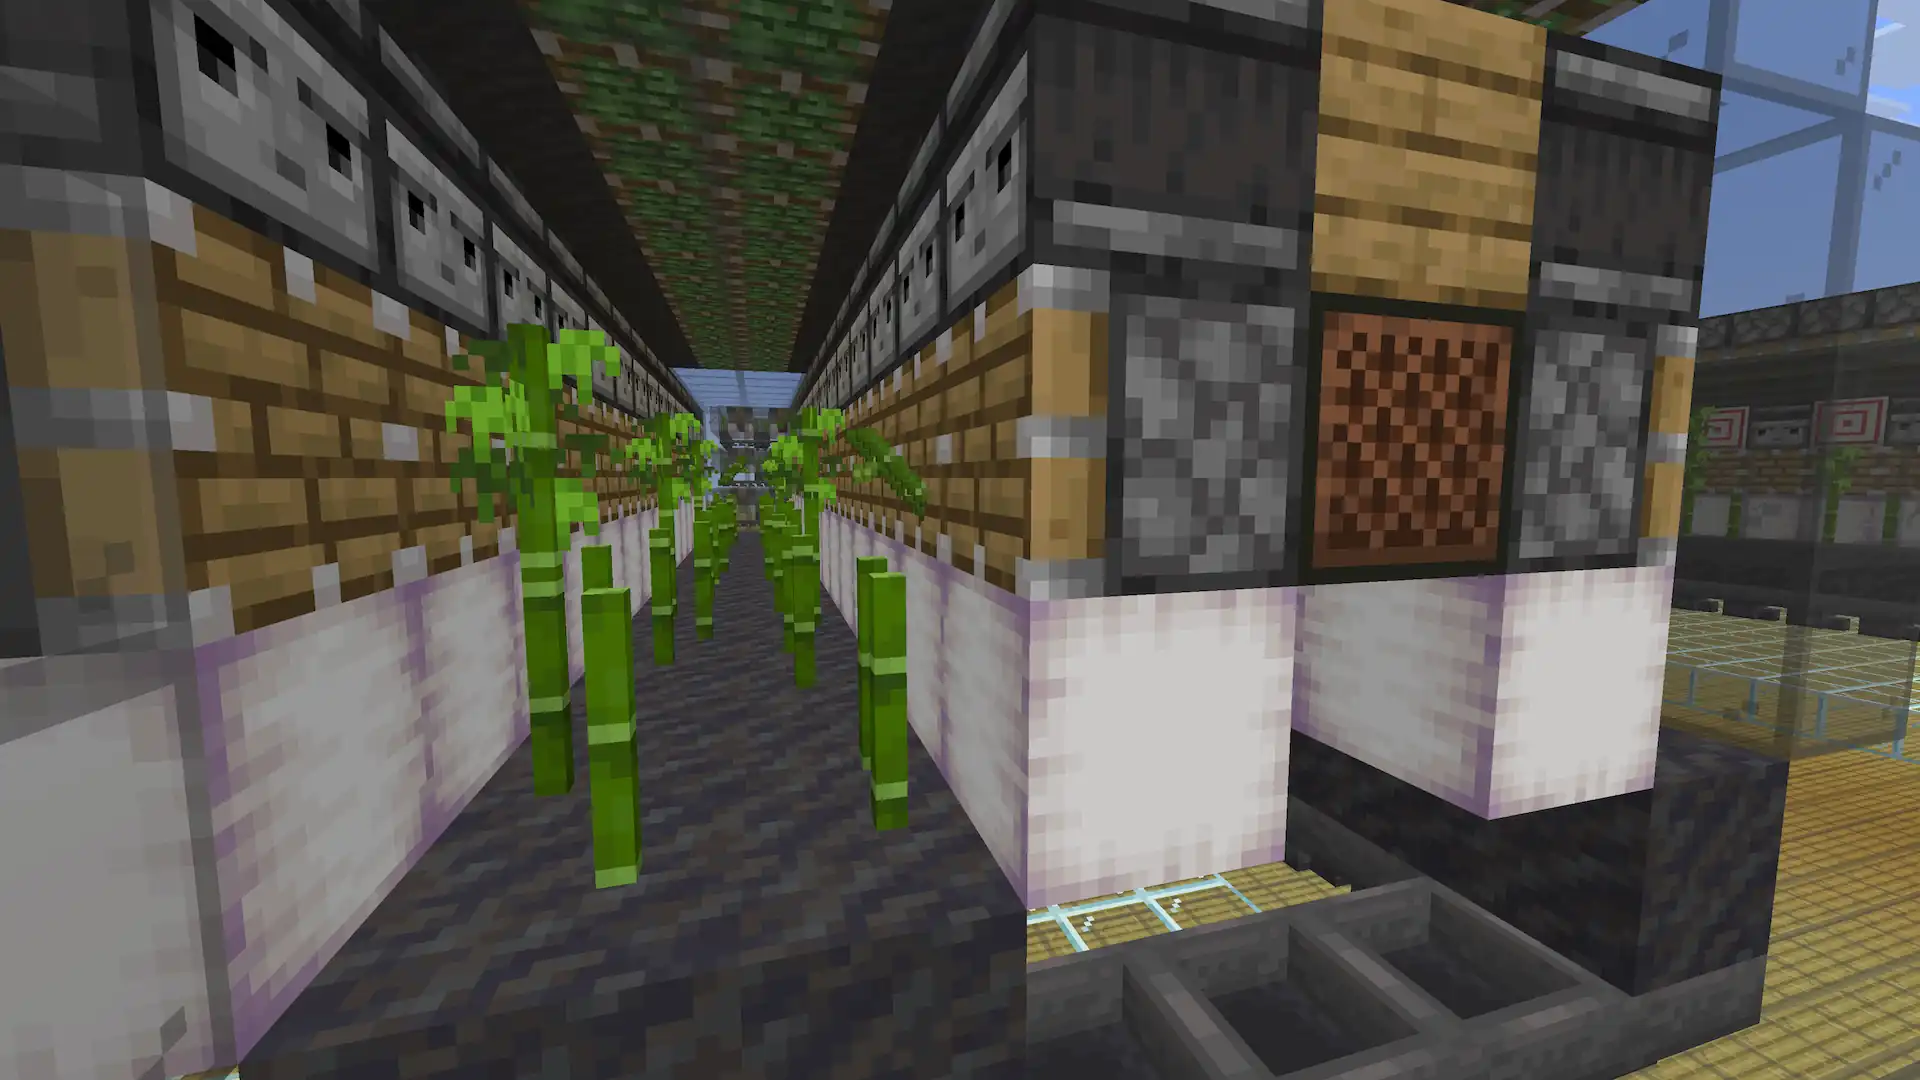
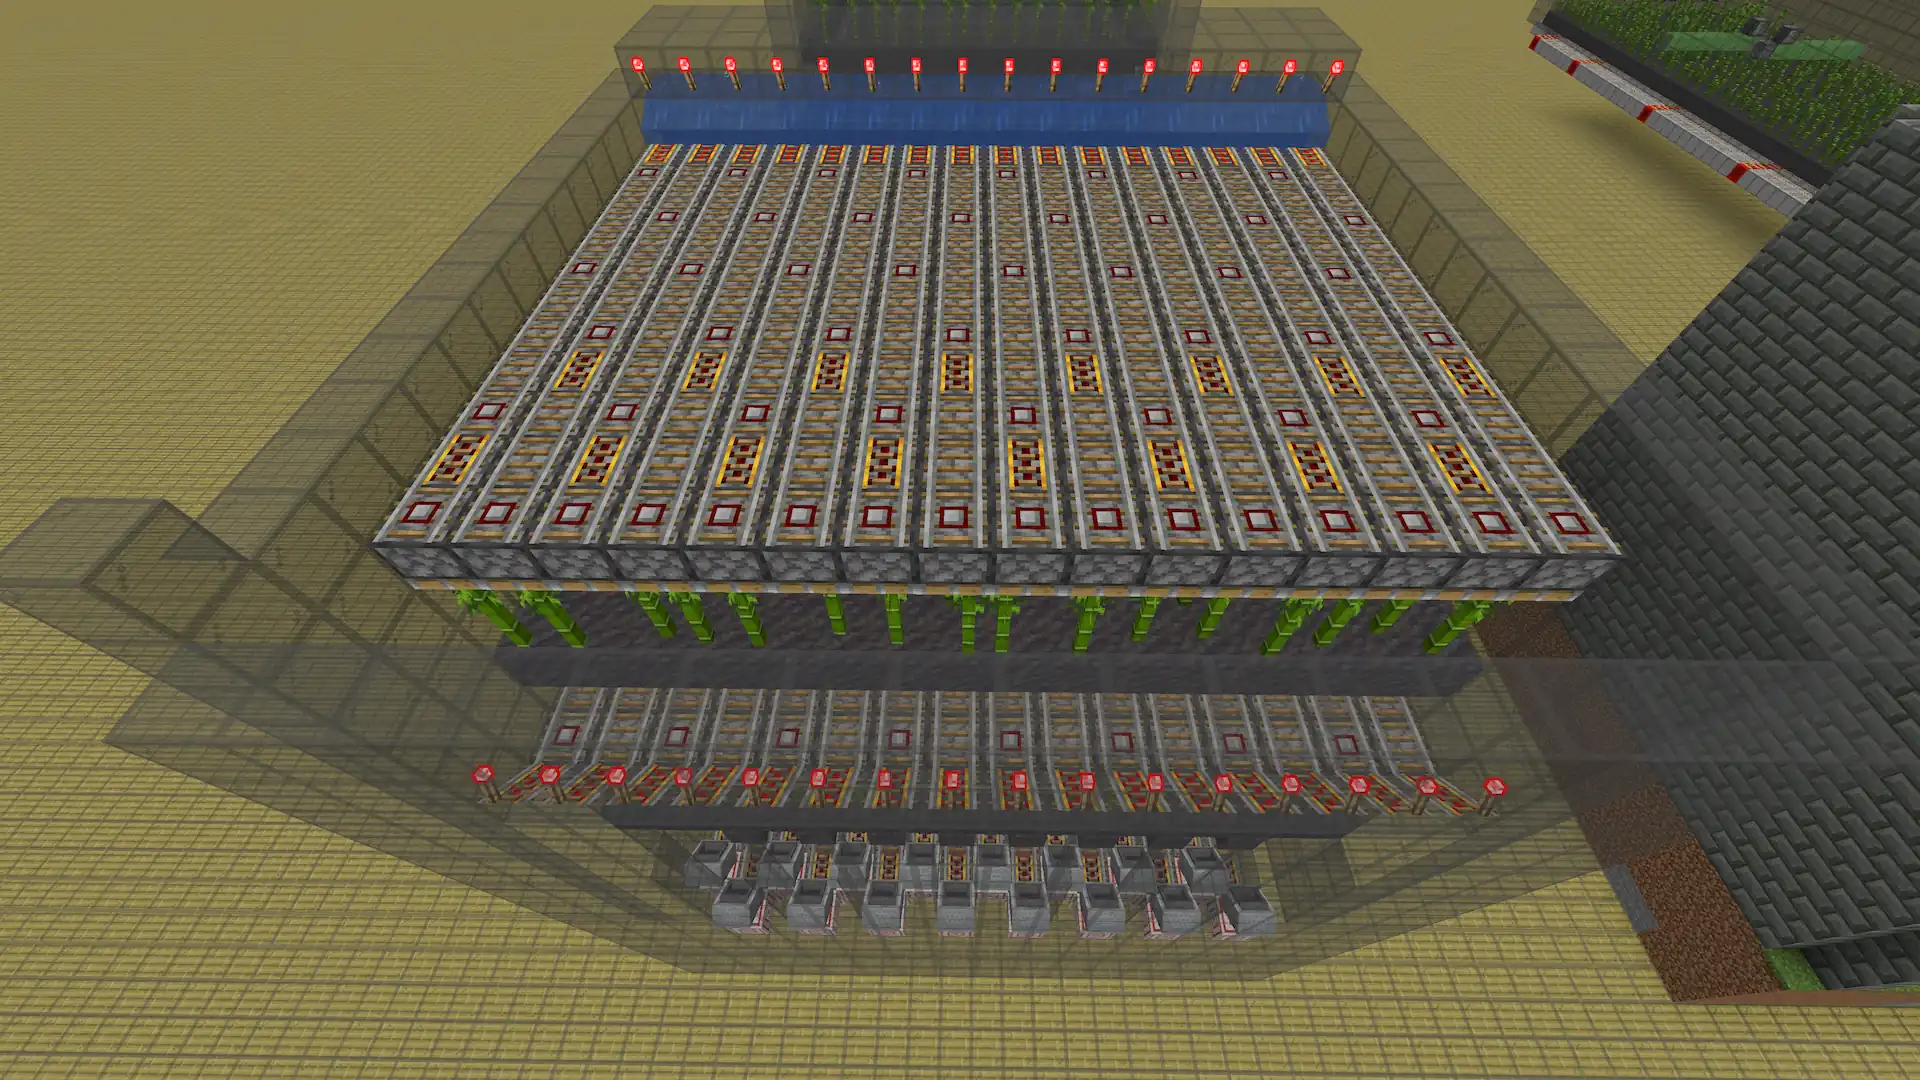
The observer-piston farm is the most common bamboo design you'll encounter in survival worlds and tutorial videos. Each bamboo stalk gets its own dedicated observer watching for growth — when the stalk grows by one block, the observer quasi-powers a piston under and behind it for harvesting.
The design is reliable and genuinely self-contained. Every stalk manages its own harvest cycle pseudo-independently, with no timing and minimal cross-plant coordination required. It's straightforward to build, trivial to tile, and it works. The trade-off is resource cost: one observer per stalk adds up fast, and the observer density makes this design one of the most expensive to build at scale.
Output per tile is decent but not exceptional. Because each stalk reacts immediately to every growth event, there's no wasted bamboo sitting on the ground — but the component overhead means fewer stalks fit within the same chunk volume compared to lighter designs. This may not seem like a huge issue, but it's actually the achilles heal of the entire design.
More on that later.
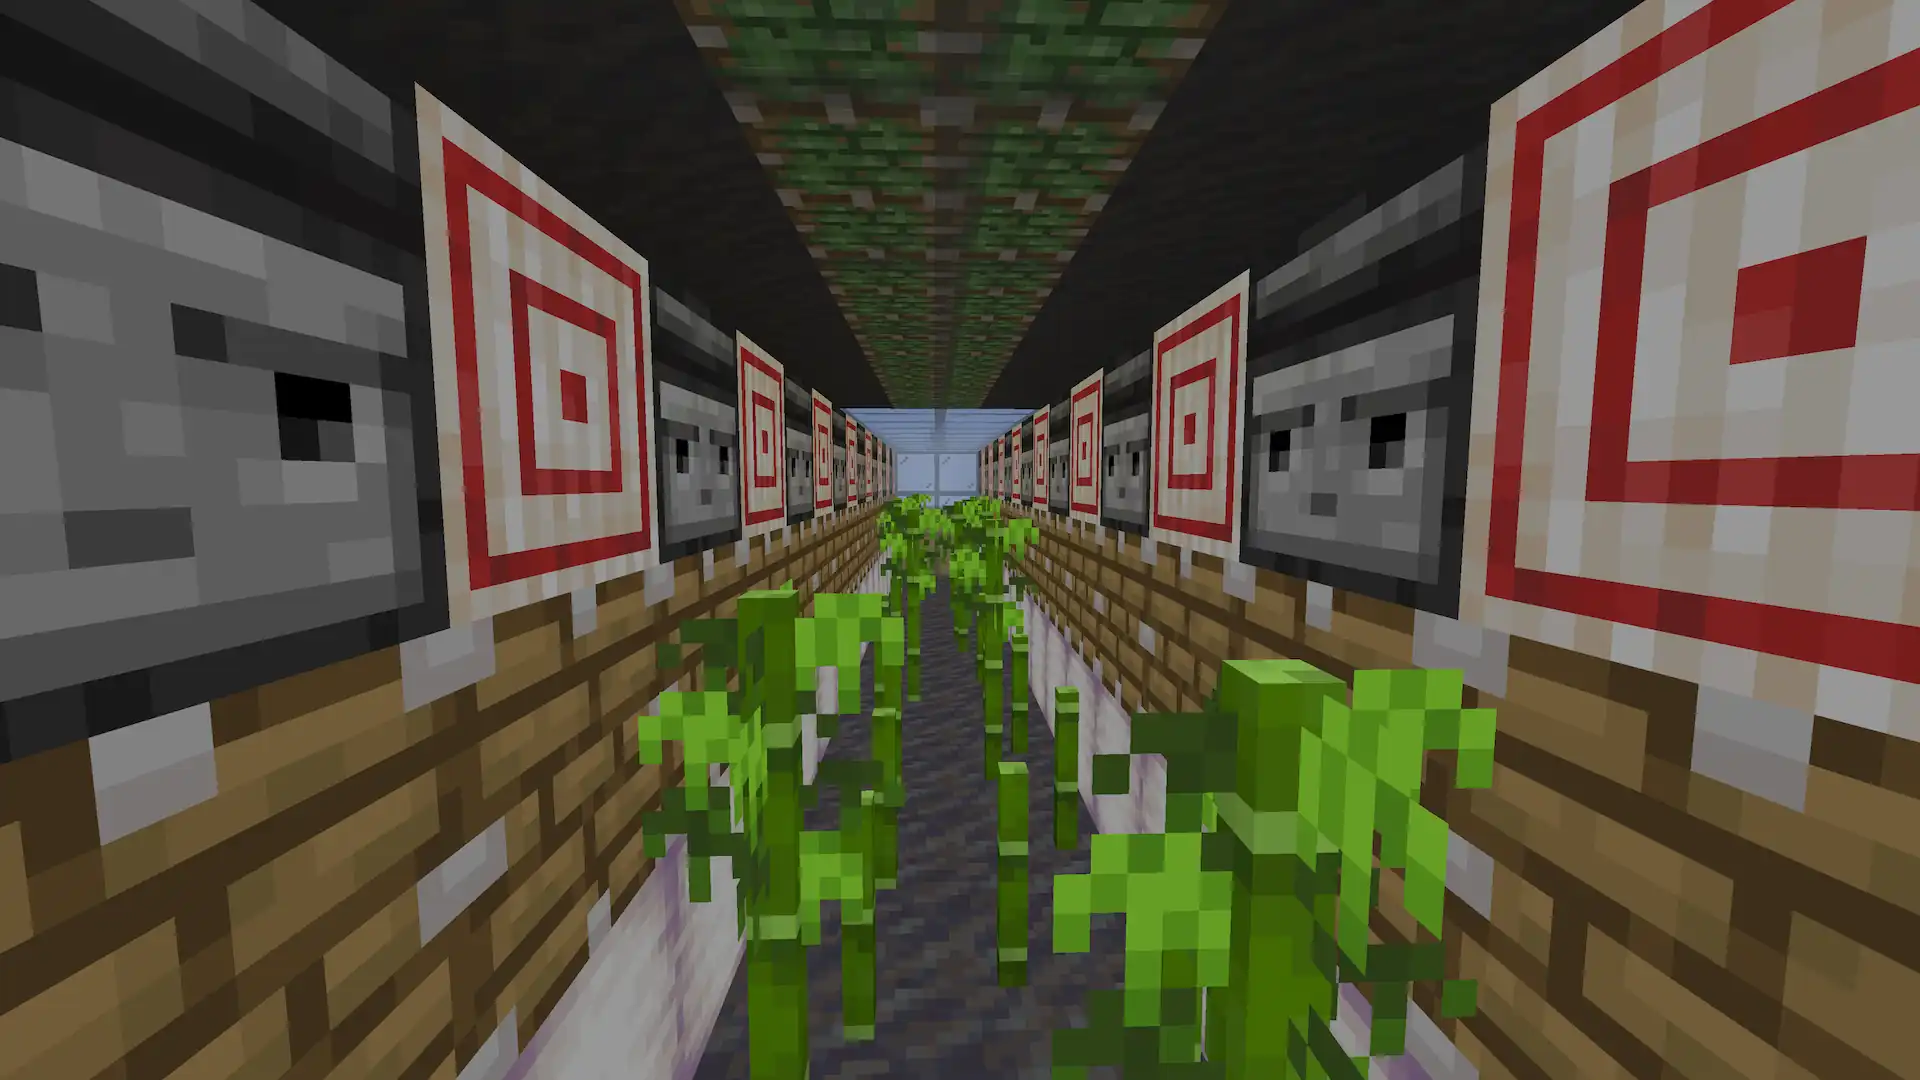
Alt Observer-Piston
The alternating variant attempts to address the observers cost overhead by sharing a single observer for every 2 pistons, firing the piston underneath and three pisonts behind rather than dedicating one to each plant. On paper this nearly halves the component count while preserving the event-driven harvesting model.
In practice there's no output gains but instead resource reductions. The shared timing introduces small windows where a stalk can grow and not be immediately detected — depending on which row the piston last fired, you may miss one growth event per cycle. Because some tiles don't have a piston, a fully grown bamboo may sit there and wait until it's neighbor who does have an observer finally grows.
Resource savings are genuine, but output per tile decreases, with tiles per chunk increasing. This ends up meaning you get identical rates for less resource input.
Timed Farm (Original)
The timed farm was my first original design, built around a completely different philosophy: instead of reacting to individual growth events, use a clock to sweep all stalks at once on a fixed interval. I used an etho-clock to fire a row of pistons approximately every 15 seconds (40 items), pushing down across an entire line of bamboo simultaneously.
The advantage is component density. With no observers at the plant level at all, you can pack bamboo shoots significantly tighter within the chunk volume. The entire harvesting mechanism is centralised into a single clock and piston row, rather than distributed across every individual stalk. Per tile, this translates to more bamboo growing in the same footprint.
The main disadvantage is ironically tied to how efficient this design is.
Computing Resource, aka. LAG...
Because we can fit so many pisons in a small area, this can come end up firing 256 pistons every 15 seconds, which as you can imagine, causing a decent amount of block updates.
This directly translates to noticable latency in your gameplay, especially as you scale the farm up.

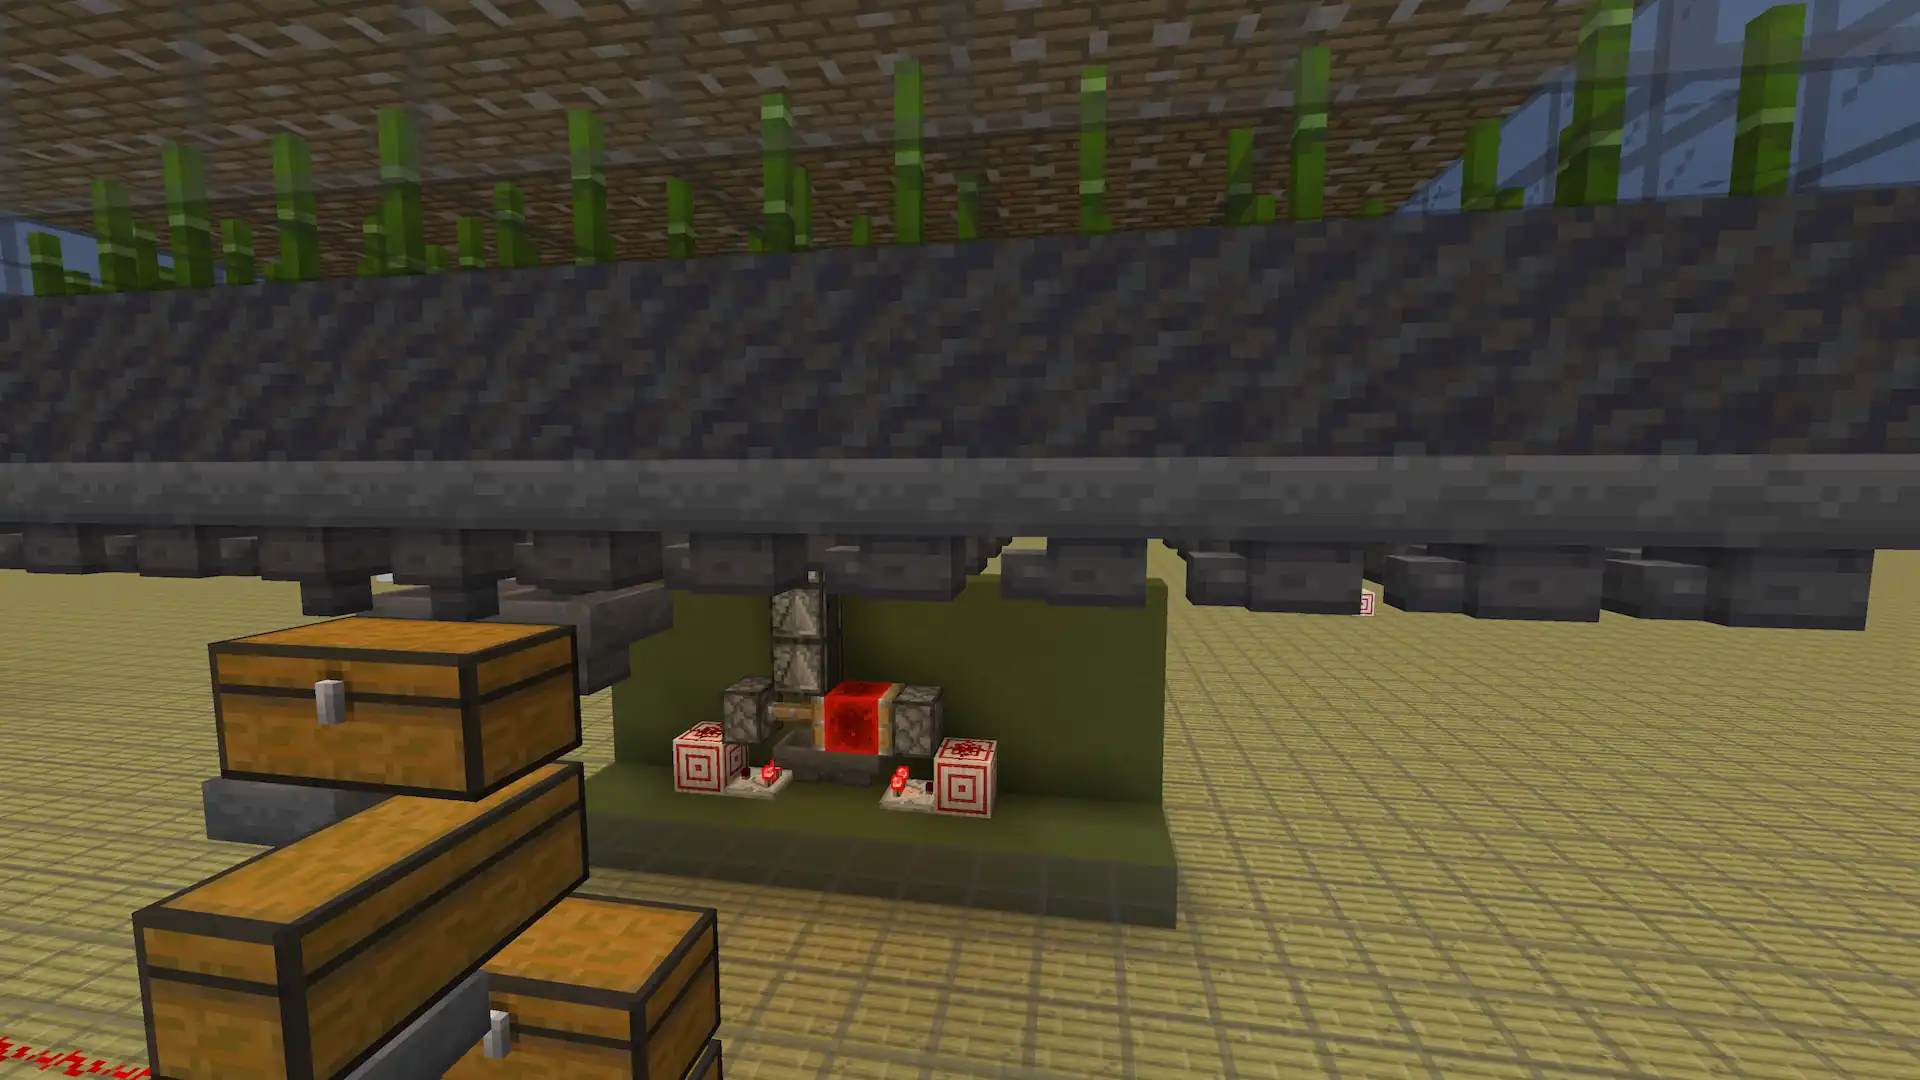

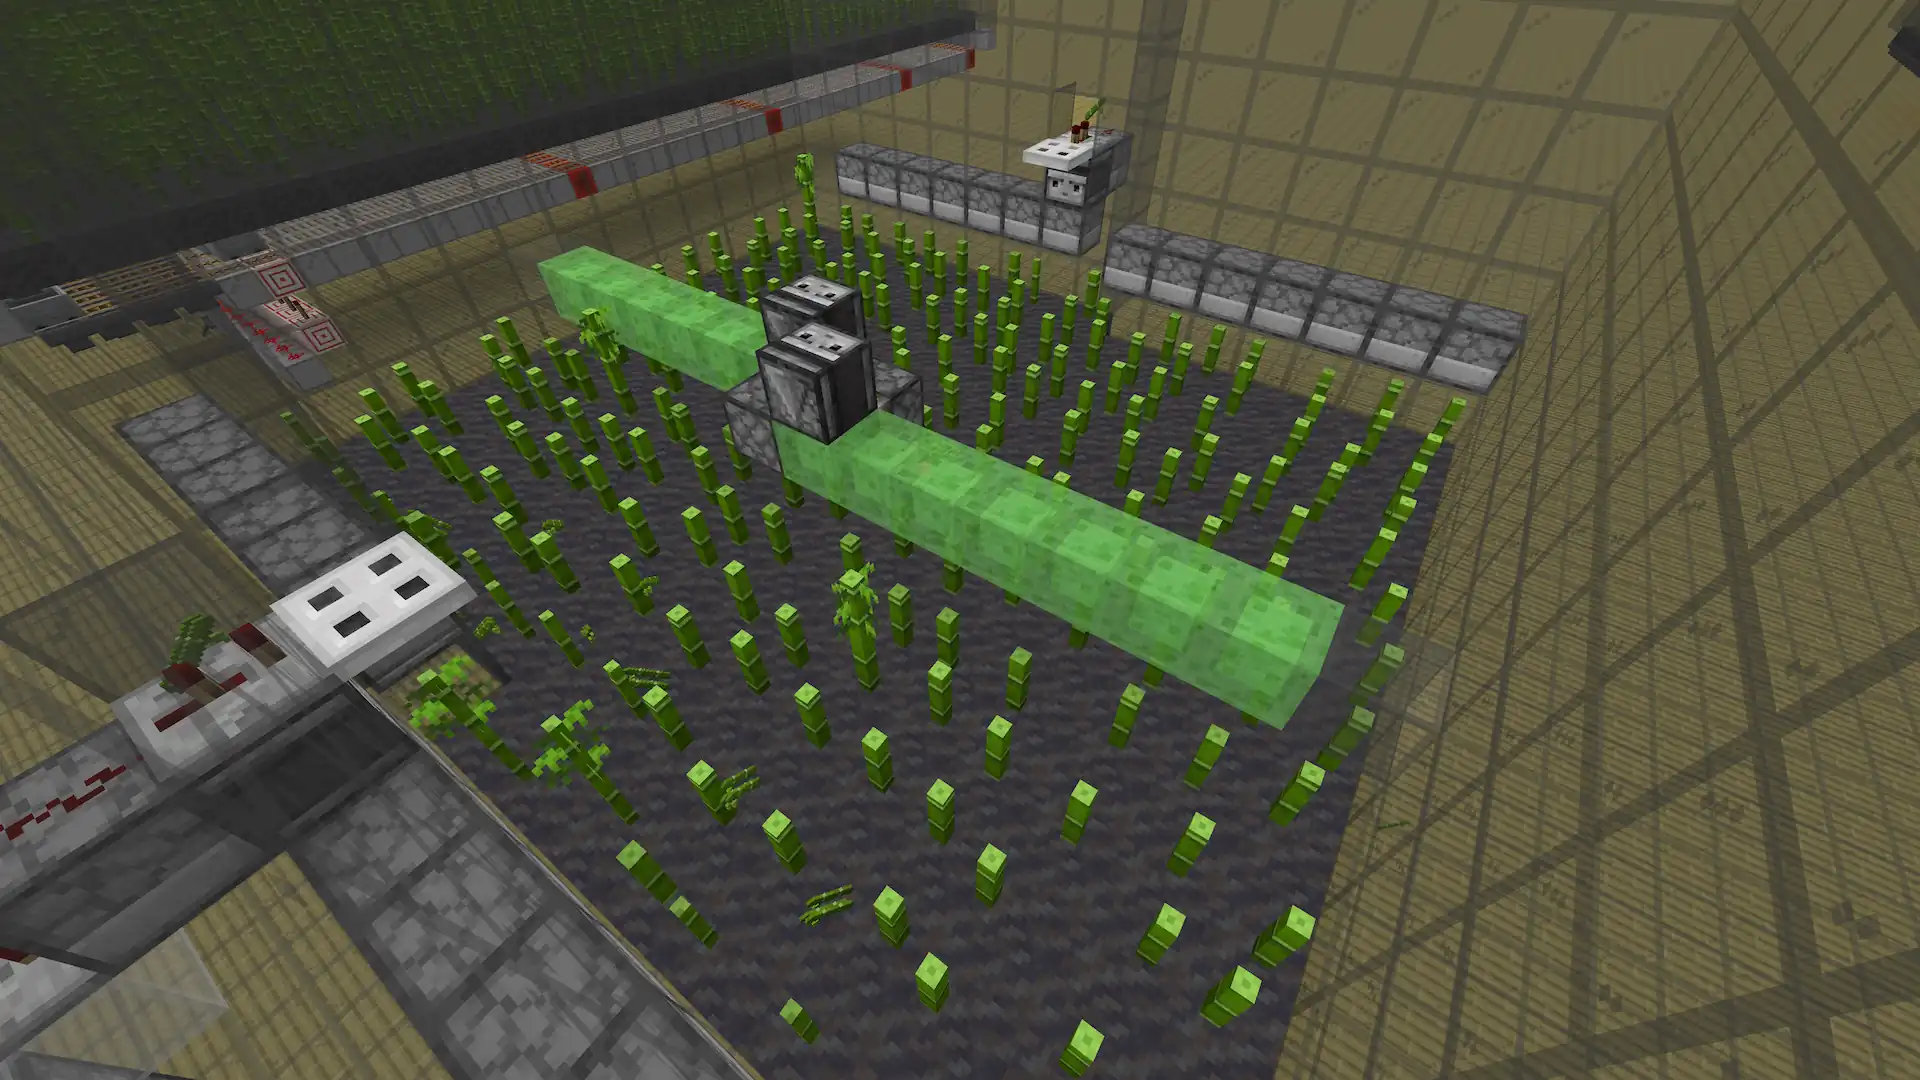
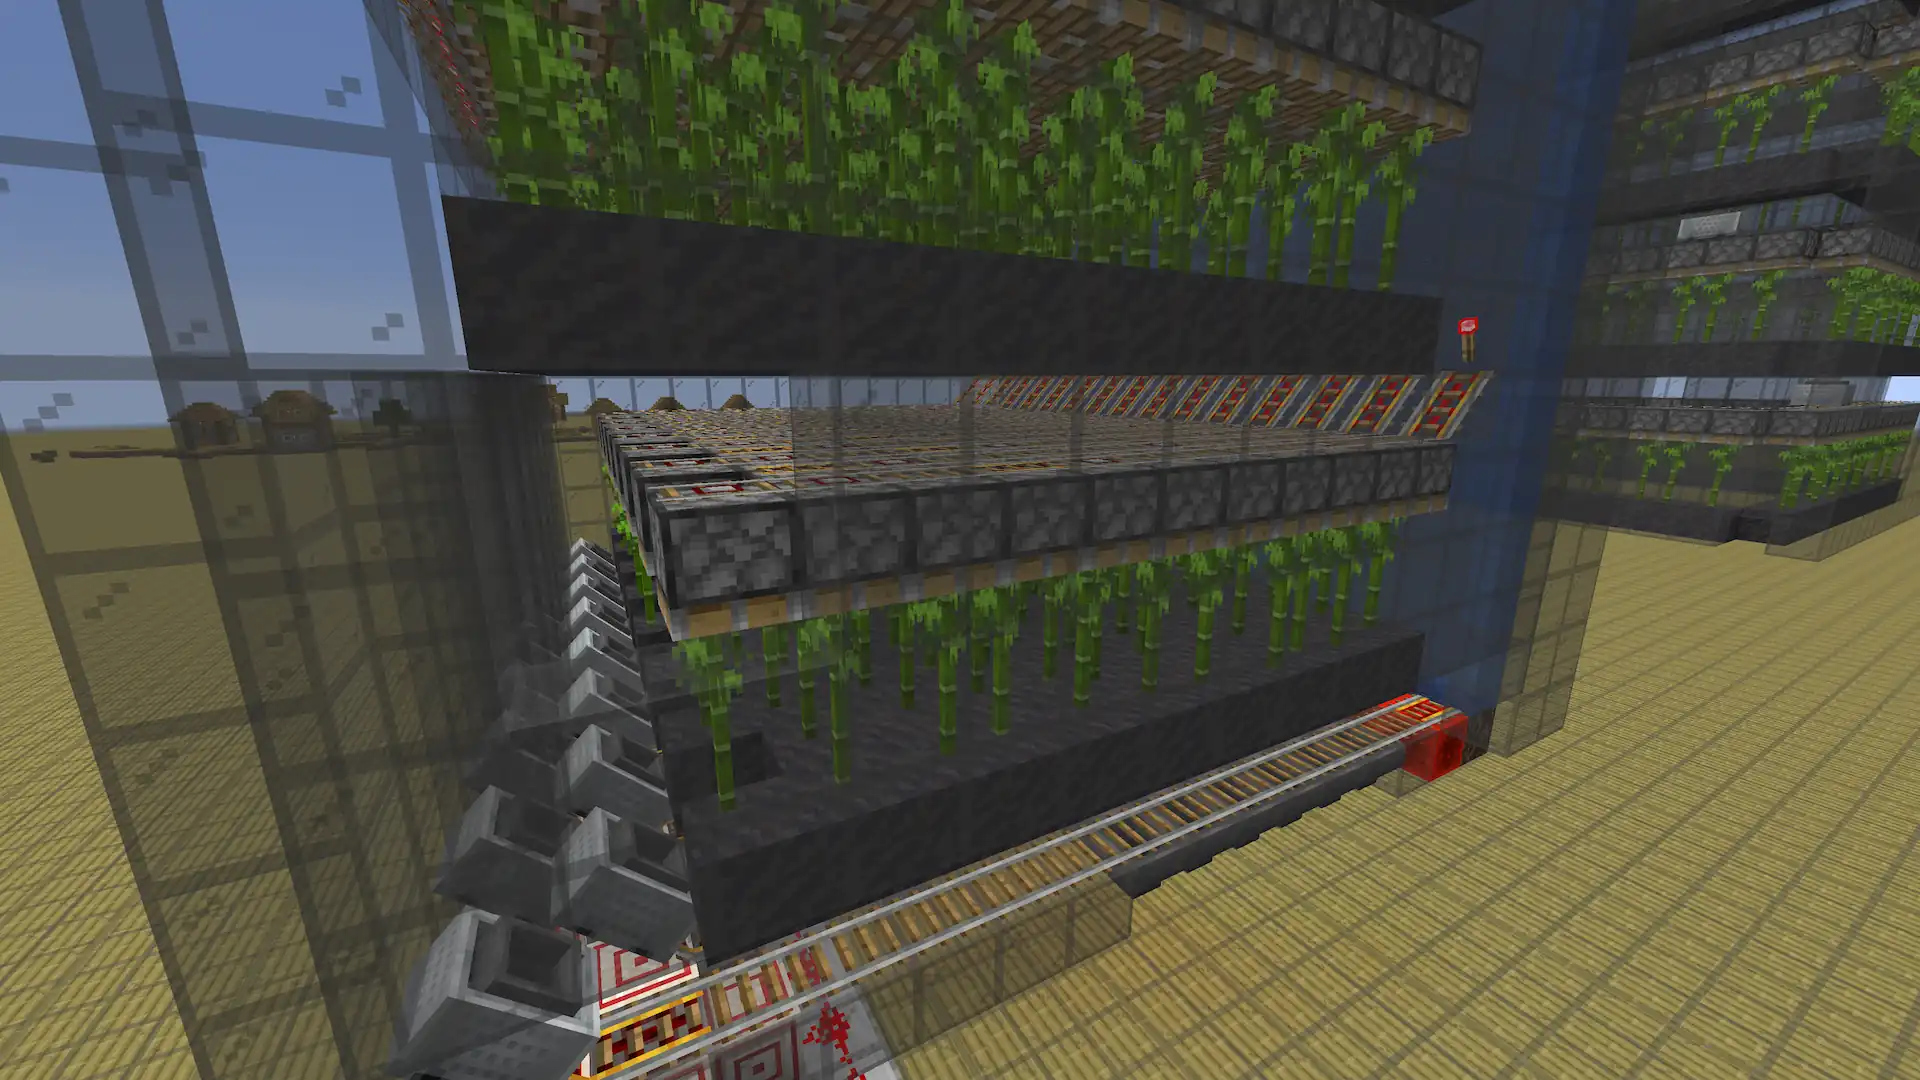
Detector Rail Farm (Original)
The detector rail farm is my second original design, and the one that ultimately earned a dedicated post of its own. The concept came from thinking about collection differently: what if the same component that triggers the harvest also picks up the output?
A hopper minecart runs continuously along a loop of powered rails laid down throughout the farm. As it passes over detector rails embedded in the track, it activates a harvesting mechanism that knocks bamboo down from the stalks on either side. The minecart then rolls drops down a lever below the harvest bamboo and collects the stalks through the dirt above — no separate collection layer, no ground hoppers, no additional infrastructure.
The loop is compact, the component count is low, and the minecart covers the entire farm continuously rather than waiting for a fixed sweep cycle. Because collection and triggering are unified in one moving component, the design is lean enough to pack bamboo shoots very densely within the available volume.
This version is the prototype. The full build — linked at the bottom of this post — has been substantially refined and represents what I believe is one of the most resource-efficient bamboo farms currently documented for Minecraft 1.21.
Data
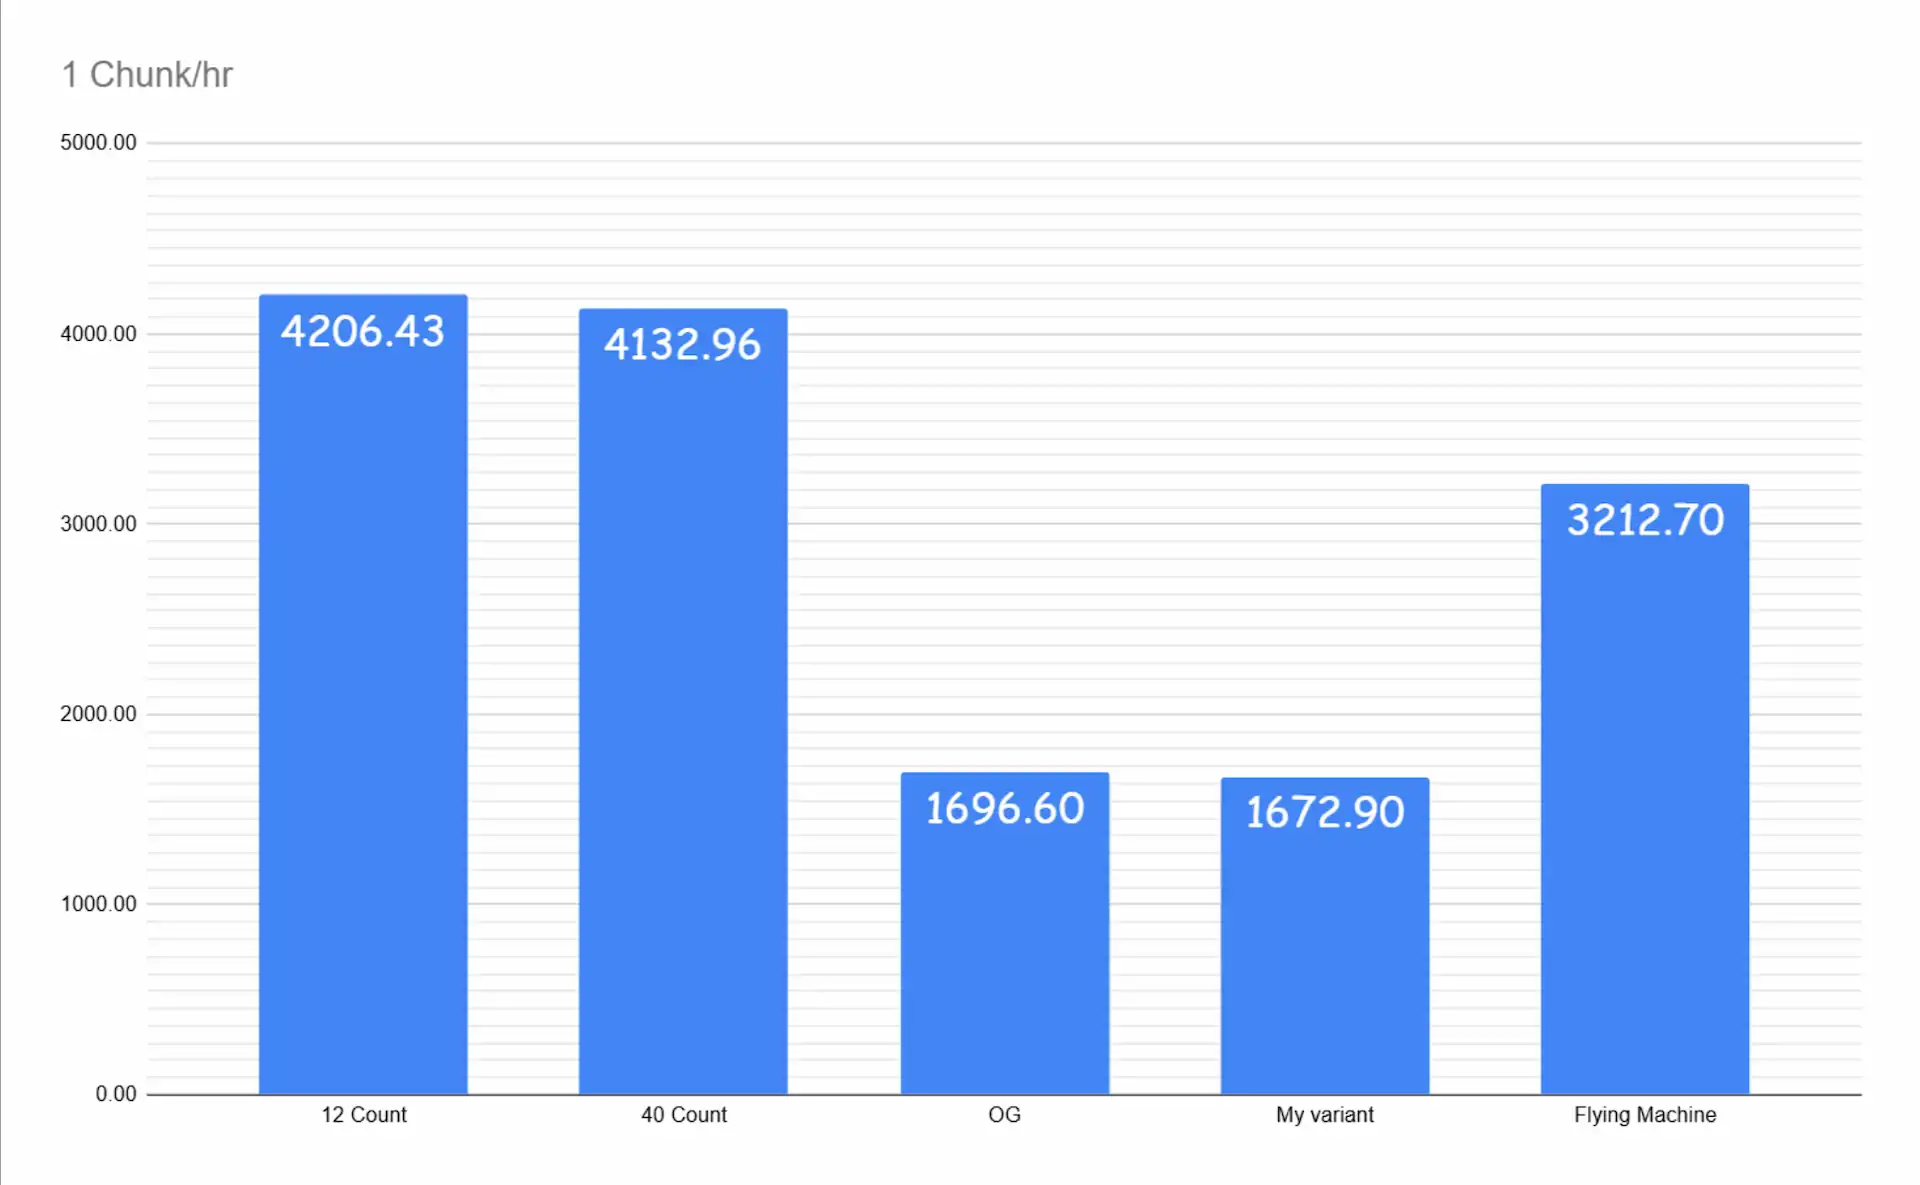
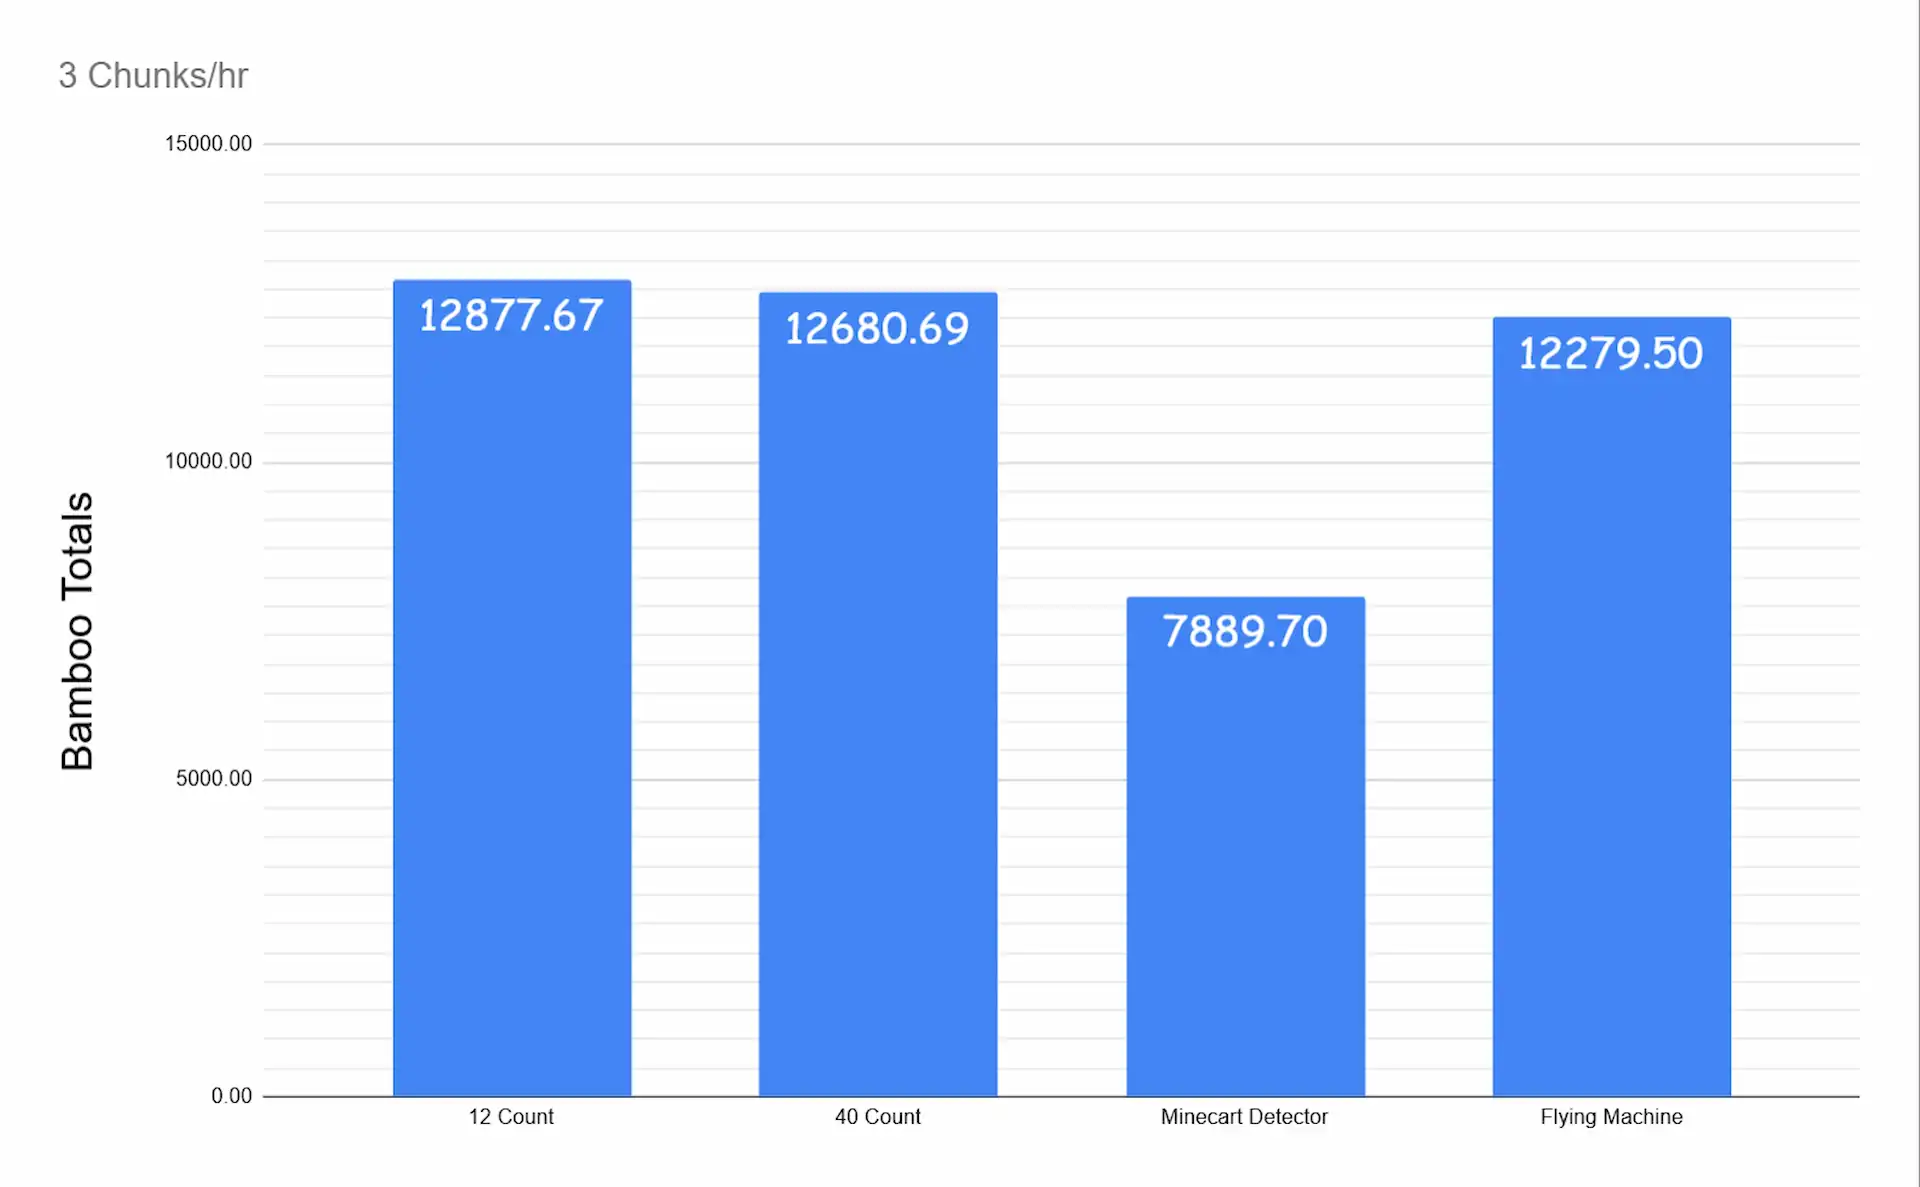
Results
With all five designs built and tested under identical conditions, the data told a consistent story. The observer-piston farm is far too resource hungry for such little return, the timed farm, although the fastest, causes too many block updates in single tick instances, and the detector rail farm, at this point in time, couldn't get outputs to match the others.
This left me with a single rational conclusion.
The flying machine is the ULTIMATE bamboo farm.
My timed machines were meant to achieve the theoretical maximum output for any given space, yet the flying machines were not far behind and did not cause the insane concurrent game updates. On top of this, I noticed once the flying machine were in a 3 chunk space, they reached the same output of the timed machine reletive to the farms volume. Meaning, in a survival world if you wanted a large bamboo farm and needed it take up 3+ chunks; the flying machine would outperform the timed machine. Which, again, was designed specifically to reach maximum output.
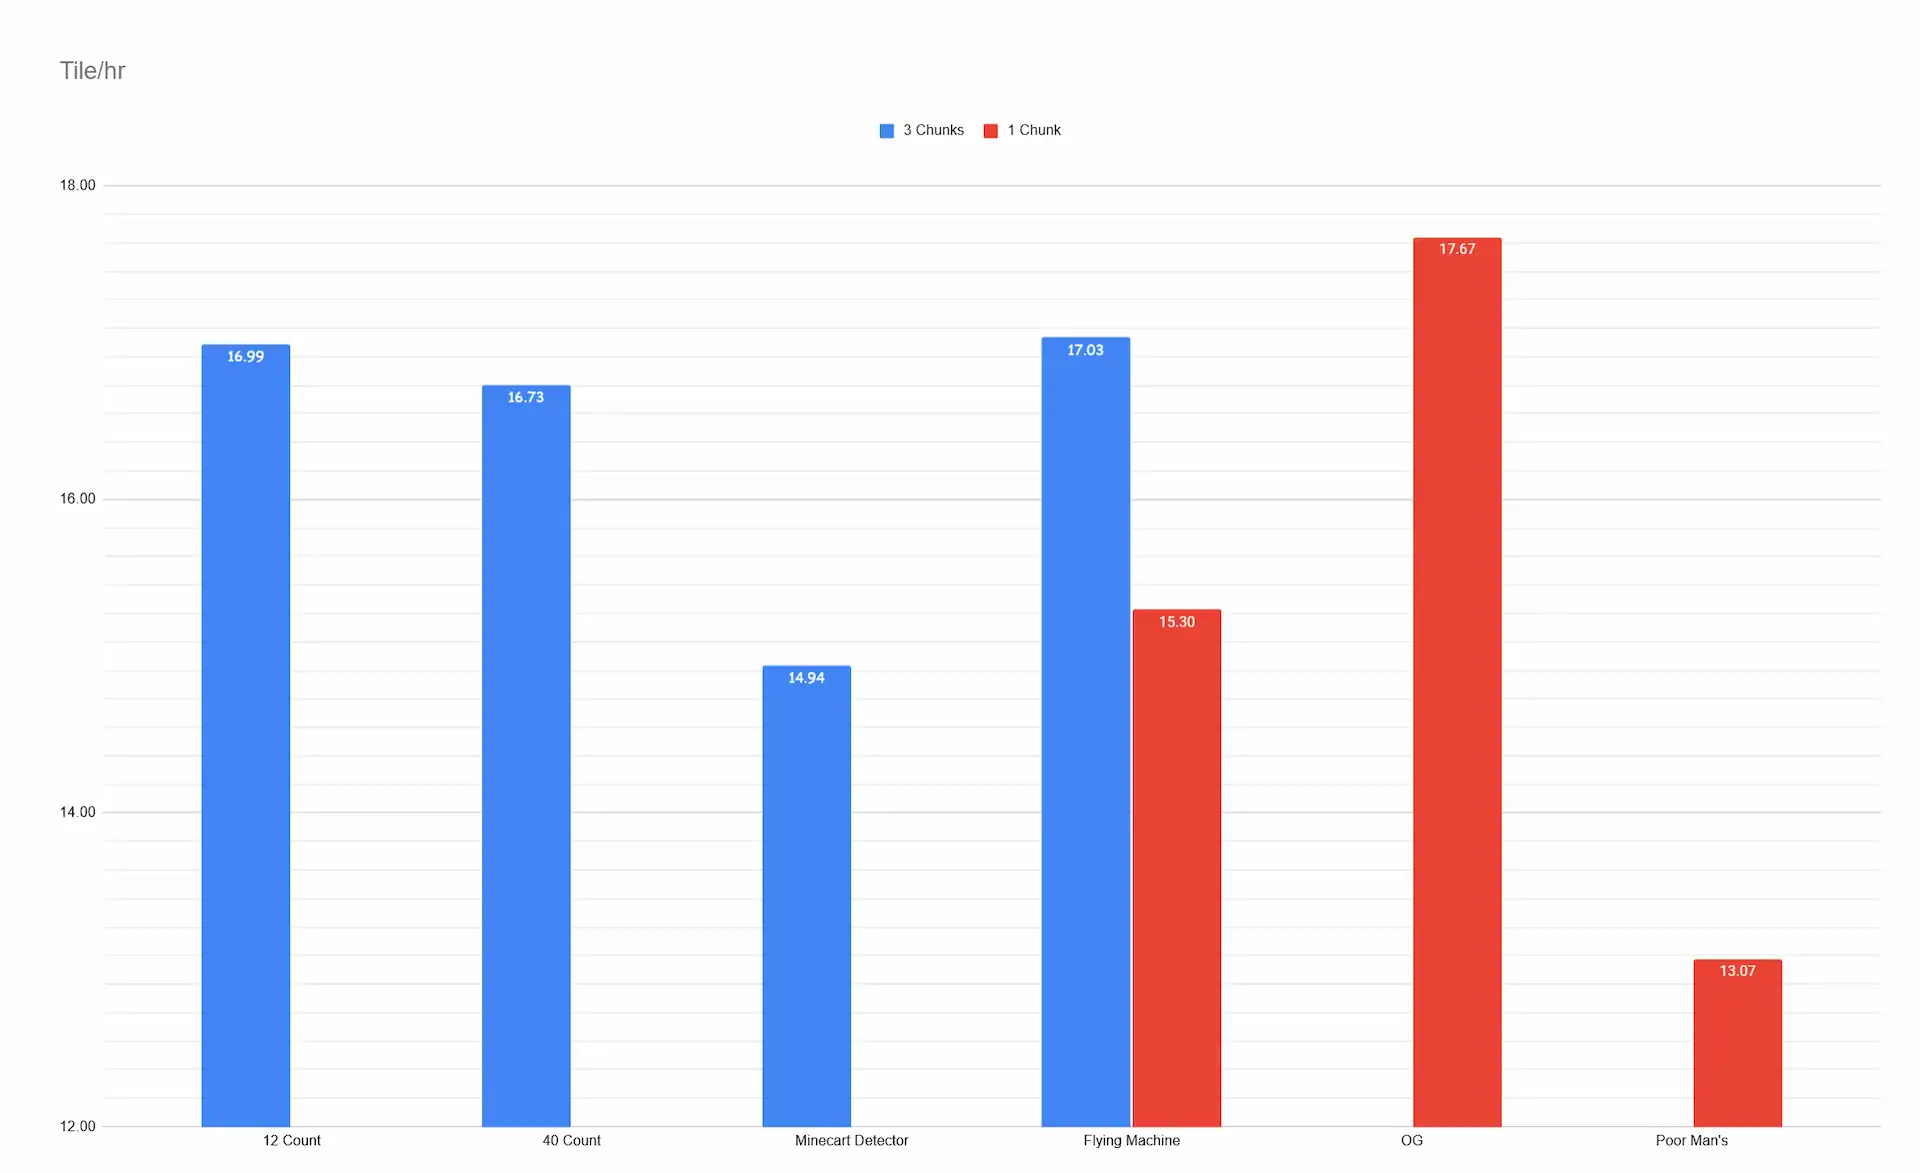
If you're choosing a farm for a survival world today: skip the observer-piston farm. Use the standard flying machine if you want a proven, high-output, low-input farm. And if you want the best resource-to-output ratio currently available without having to, worry about breaking during chunk loading, look at the full detector rail build linked below — the version tested here is just where it started.
Support the Creator
Enjoying the build?
Every world on this site is completely free. If you'd like to support future projects, each tier below comes with a permanent thank-you built into the work itself.
Community
Download and explore the full world at no cost, forever. No strings attached.
Already Free ↑Supporter
Your name credited at the end of all related YouTube videos.
Choose This Tier →Patron
A named sign placed inside future world downloads as a permanent thank-you.
Choose This Tier →Champion
A small statue or named mob in your honor built into future world downloads.
Choose This Tier →Monthly tier via Patreon. One-time tiers processed securely via Stripe.
Free Download
Bamboo Comparisons
World Download
The full comparison world — all five bamboo farm designs built side by side in a controlled test environment. Run your own numbers, tweak the designs, or use it as a reference when planning your own farm.
Minecraft Version
1.21.10